Contact Us For a Free Qoute
Landscaping Around House to Prevent Water Damage (Now)
Your Landscaping Is Either Saving Your House or Destroying It—And You Probably Don’t Know Which
Water damage costs American homeowners an average of $11,000 per incident. Most of the time, the culprit isn’t a burst pipe or a roof leak—it’s what’s happening right outside your door. Poor grading, wrong plant placement, and neglected soil around your foundation create a highway for water to flow straight into your basement, crawl space, or foundation walls.
The good news? Landscaping around house to prevent water damage is one of the cheapest, most effective defenses you’ve got. And it doesn’t require hiring a crew or breaking the bank.
This guide walks you through exactly how to use landscaping strategically to keep water away from your foundation. We’re talking grading, drainage, plant selection, and maintenance—the stuff that actually works.
Why Your Landscaping Matters More Than You Think
Water follows gravity. It also follows the path of least resistance. If your landscaping is flat, slopes toward your house, or channels water right to your foundation, you’re basically inviting trouble.
Here’s the reality: one Rochester homeowner ignored grading issues around their property for five years. When heavy spring rains hit, water pooled against the foundation and seeped into the basement. The repair bill? $18,000 for basement waterproofing and structural fixes that could’ve been prevented with proper landscaping.
Water doesn’t care about your property value or your plans for the weekend. It moves, it pools, and it finds cracks. Your job is to redirect it before it gets there.
Bottom line: Correct landscaping stops water before it reaches your foundation, saving you thousands in repairs.
Step 1: Get Your Grading Right—The Foundation of Everything
Grading is the slope of the ground around your property. Most building codes require the ground to slope away from your house at a rate of at least 1 inch per foot for the first 5-10 feet. That means for every foot of horizontal distance away from your house, the ground should drop 1 inch in elevation.
Sounds simple, right? Most properties don’t follow this. Over time, soil settles, compacts, and shifts. Landscaping around your house to prevent water starts by checking your grade.
Stand in your yard after a light rain. Where does water pool? If it’s anywhere near your foundation, your grade is working against you. Water should be flowing away, not sitting.
To fix it, you’ve got options:
- Add fill dirt to build up the grade near your foundation (the most common and affordable fix)
- Excavate and regrade if the problem is severe (more expensive but permanent)
- Install French drains or swales to redirect water away if regrading isn’t possible
One thing to remember: don’t pile dirt directly against your house siding or foundation. Leave at least 6 inches of clearance. Soil against wood creates rot and pest problems. Against masonry or concrete, it traps moisture and accelerates deterioration.
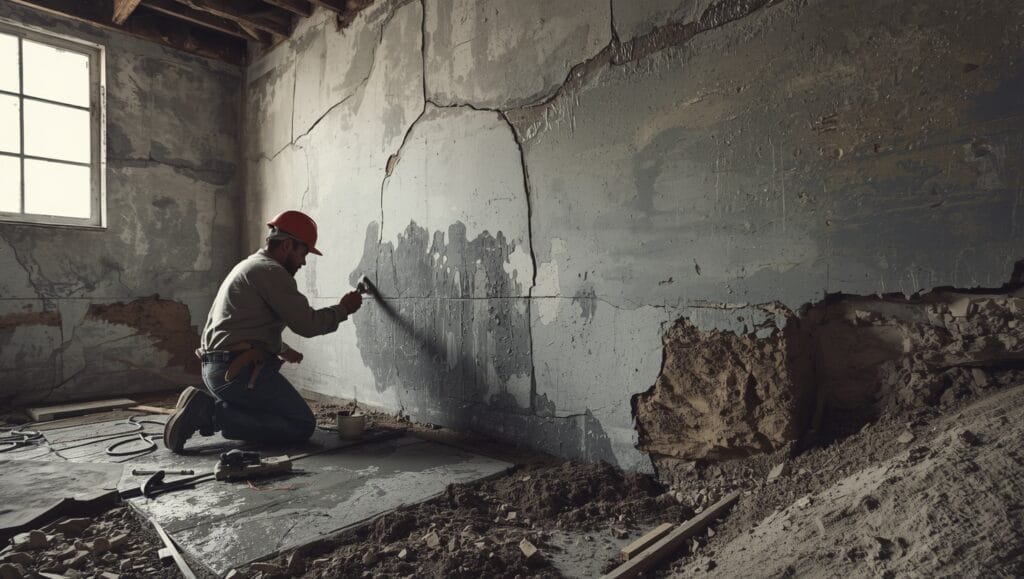
A homeowner in Rochester called Mark Frillici at Healthy Spaces after discovering water in their basement following every heavy rain. The issue wasn’t hidden—it was visible grading that sloped toward the house. A $3,000 regrading project eliminated the problem entirely. No waterproofing needed. No mold remediation. Just smart landscaping.
Bottom line: Grade should slope 1 inch down per foot away from your foundation for at least 10 feet.
Step 2: Choose the Right Plants and Root Systems
Not all plants are created equal when it comes to water management. Some trees and shrubs actually help pull moisture from soil. Others create dense root systems that prevent water from draining properly. Landscaping around your house to prevent water means being intentional about plant selection.
Trees with aggressive root systems—like willows, poplars, and silver maples—are water magnets. They’ll seek out moisture, which means they’re pulling water away from your foundation. Sounds good, right? Here’s the catch: their roots can crack foundations, damage pipes, and create voids in soil as they consume water. Plant them at least 20 feet away from your house.
Shrubs and ground cover near your foundation should have shallow, non-invasive root systems. Think ornamental grasses, dwarf evergreens, and flowering shrubs with fibrous roots. They won’t damage your foundation, and they add visual appeal without the risk.
Avoid planting anything directly against your house. Roots trap moisture. Dense foliage blocks air circulation and creates humidity against siding. Leave at least 3-5 feet of clearance between plants and your foundation.
Bottom line: Plant shallow-rooted species away from foundations; keep aggressive water-seekers 20+ feet back.
Step 3: Mulch Strategy—It’s Not Just for Looks
Mulch controls moisture in soil. It sounds backward, but the right mulch application actually helps water drain away from your foundation instead of pooling.
Here’s how it works: mulch acts as a buffer. It slows water absorption into the soil directly beneath, which gives water time to flow downhill instead of soaking in right next to your house. It also keeps soil temperature consistent, which reduces settling and shifting—another cause of grading problems.
The key is application. Keep mulch 6 inches away from your foundation and siding. Piling mulch against your house creates a moisture trap. Use 2-3 inches of mulch around planting beds, and refresh it annually.
Avoid colored mulches treated with dyes if possible. They break down faster and often contain chemicals. Hardwood mulch or cedar chips are better for drainage and last longer.
Bottom line: Mulch 3 inches thick, 6 inches away from foundation, keeps soil stable and water moving.
Step 4: Create Drainage Paths With Swales and Berms
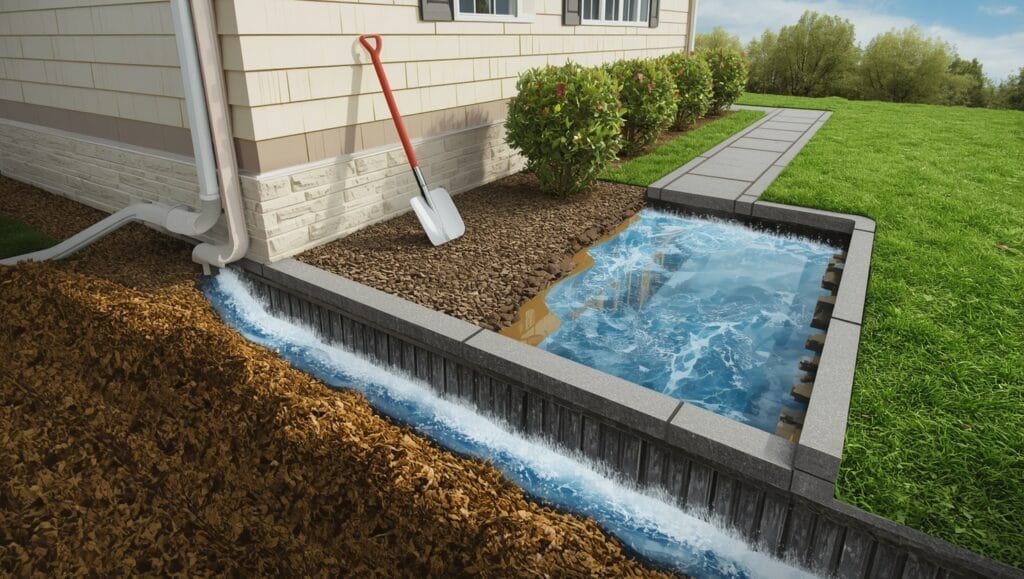
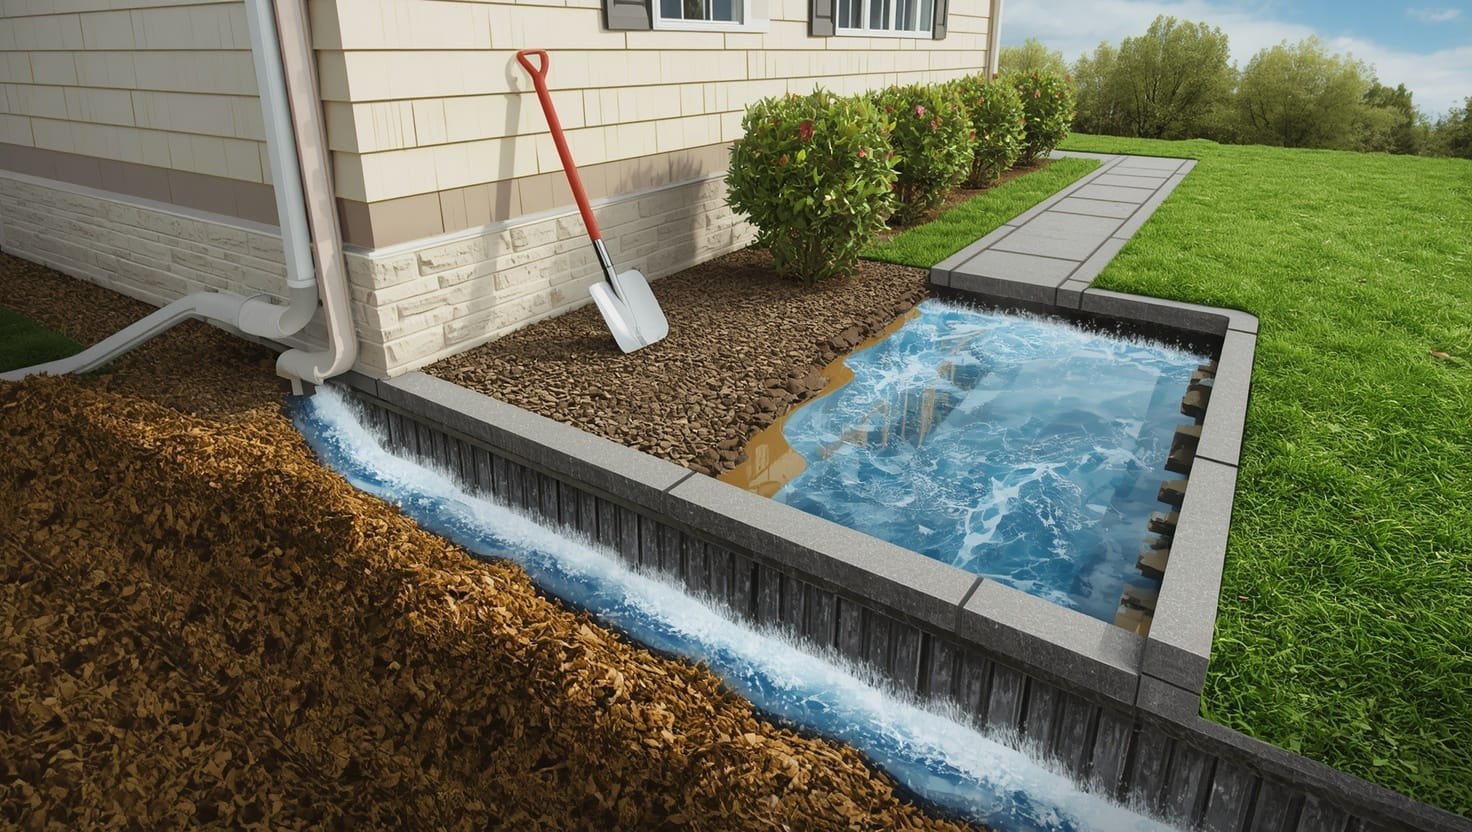
A swale is a shallow, slightly sunken path that channels water away from your house. A berm is a low ridge that redirects water flow. Both are powerful tools in landscaping around your house to prevent water from pooling or penetrating your foundation.
If your yard doesn’t naturally slope away, or if you have a flat lot, swales and berms are your answer. They’re inexpensive to install and invisible once plants grow in.
A typical swale is 6-12 inches deep and 3-4 feet wide. It runs perpendicular to the direction water flows, catching it and channeling it away from your foundation. You can plant low-growing shrubs or grasses in a swale—they’ll actually thrive because they’ll get consistent moisture.
Berms work differently. They’re built-up areas that force water to flow around them. If you have a low spot next to your house, a berm on the uphill side will prevent water from flowing toward your foundation.
One homeowner in the Rochester area had a flat lot with a history of water leaking into the basement after heavy rain. Mark’s team installed a swale system that curved around the property, directing water to the street drainage system. Cost: $4,500. It’s been five years with zero water issues since.
Bottom line: Swales and berms redirect water away from your foundation without expensive construction.
Step 5: Hardscaping—Permeable Pavers and Strategic Placement
Patios, walkways, and driveways are part of landscaping too. And they’re either helping or hurting your water situation.
Solid concrete or asphalt creates a barrier that forces water to run off quickly. If that runoff flows toward your house, you’ve got a problem. Water hits concrete, spreads out, and pools against your foundation at high volume.
Permeable pavers, gravel, or porous concrete allow water to drain through instead of running off. They’re more expensive upfront, but they reduce pooling and let water infiltrate the soil gradually—away from your foundation.
If you’ve already got solid hardscaping, you can redirect the runoff with grading or by installing a drainage channel (called a swale or French drain) along the edge to capture water and move it away.
Never slope a patio, driveway, or walkway toward your house. Always slope away, even if it’s subtle. That 1-inch-per-foot rule applies to hardscaping too.
Bottom line: Permeable hardscaping or proper slope prevents water from pooling against your foundation.
Step 6: Rain Gardens and Bioswales—Nature’s Water Management
A rain garden is a planted depression that catches and filters runoff from your roof, driveway, and yard. It’s landscaping that works for you—not against you.
Here’s how it works: rain falls, flows into the depression, and gets absorbed by soil and plants over 24-48 hours. The water filters through, replenishes groundwater, and never reaches your foundation. Meanwhile, you’ve got a beautiful planted area that attracts pollinators and adds curb appeal.
Rain gardens work best 10-15 feet away from your house, positioned to catch runoff from downspouts or sloped areas. They’re 4-8 inches deep and planted with native species that tolerate wet conditions—like sedges, coneflowers, and black-eyed Susans.
A bioswale is similar but longer and narrower—it’s designed to move water along a path while filtering it. Both are increasingly popular in Rochester and other areas with heavy seasonal rainfall.
Cost is minimal. You’re basically digging a hole, adding plants, and letting nature do the work. Some municipalities even offer rebates for rain garden installation because they reduce stormwater runoff.
Bottom line: Rain gardens filter runoff before it reaches your foundation, plus they look good.
Step 7: Downspout and Gutter Management—The Often-Overlooked Piece
Your gutters and downspouts direct water from your roof. If they’re dumping water right next to your foundation, all your landscaping work is wasted.
Downspouts should extend at least 4-6 feet away from your foundation. Longer is better. If you’ve got a basement or crawl space, water pooling near the foundation will find its way in.
Some people use splash blocks—those plastic or concrete pieces under downspouts. They help, but they’re not a complete solution. Water still pools nearby.
Better options:
- Extend downspouts underground with PVC pipe to drain water 10+ feet away (most effective)
- Use flexible downspout extensions that can be rolled away during dry periods
- Install a proper drainage system that captures water at the foundation level and directs it to a sump pump or away from the property
One detail most people miss: check your gutters regularly. Clogged gutters overflow, and water spills down in concentrated streams right against your house. Clean gutters twice a year—spring and fall. It takes 30 minutes and prevents thousands in damage.
Bottom line: Downspouts must extend 4-6 feet away from your foundation, not pool nearby.
Step 8: Seasonal Maintenance—Keep Your Landscaping Working
Landscaping around your house to prevent water isn’t a one-time project. It requires maintenance.
Spring: Check grading after snow melts. Does water pool near your foundation? Clear gutters and downspouts. Inspect for any settling or erosion.
Summer: Monitor plants. Are they healthy and helping with drainage, or are they stressed? Check for soil compaction around your foundation. If the ground feels hard and doesn’t absorb water, it needs aeration.
Fall: Clean gutters again. Leaves are the enemy of drainage. Check grading one more time before winter.
Winter: In Rochester and other cold climates, watch for ice dams and snow buildup against your house. Both can trap water and create pressure against your foundation.
Every 3-5 years, reassess your grading. Soil settles. Mulch breaks down. What worked five years ago might need adjustment now.
Bottom line: Seasonal checks and maintenance keep your landscaping effective year-round.
What If It’s Too Late? When Landscaping Isn’t Enough
Sometimes water has already won. You’ve got a wet basement, visible mold, or structural damage. Landscaping fixes alone won’t save you.
That’s when you need professional help. Interior or exterior waterproofing, mold inspection, and foundation repair might be necessary. The good news is that once the damage is fixed, proper landscaping prevents it from happening again.
Mark Frillici has been helping homeowners and businesses in Rochester and the surrounding areas manage water damage since 2006. He knows that prevention through smart landscaping is always cheaper than fixing damage after the fact. But he also knows that sometimes you need both—the landscaping to prevent future problems and the professional waterproofing to fix what’s already happened.
Bottom line: Landscaping prevents water problems; professional waterproofing fixes existing damage.
The Bottom Line on Landscaping Around Your House to Prevent Water
Water damage is expensive, destructive, and preventable. Most of it starts outside—with grading, plant placement, drainage, and gutter management. Landscaping around your house to prevent water isn’t complicated. It’s about understanding how water moves and making sure it moves away from your foundation, not toward it.
Start with grading. Check it after rain. If water pools near your house, fix it. Then work through the other steps: plants, mulch, swales, hardscaping, rain gardens, and downspouts. It’s a system, not a single fix.
And if you’re already dealing with water damage or mold growth, don’t wait. Water damage gets worse fast, and mold can take over in less than 48 hours.
Mark and his team at Healthy Spaces have saved homes like yours for over 20 years. If you’re in Rochester or the surrounding areas and you’re dealing with water in your basement, mold, or foundation issues—don’t guess. Get a professional assessment. Contact Healthy Spaces now and get help fast. Your foundation—and your wallet—will thank you.
Your Yard’s Silent Enemy: Why Landscaping Around House to Prevent Water Fails Most Homeowners
You’ve done everything right. You regraded your yard. You planted shrubs. You cleaned your gutters twice last season. Then spring rolls around, heavy rain hits, and water’s pooling against your foundation anyway.
What went wrong?
Most homeowners miss the interconnected pieces. Landscaping around your house to prevent water isn’t about doing one thing perfectly—it’s about making sure all the parts work together. One weak link, and water finds its way in.
This is where most DIY efforts fail. You fix the grading but ignore soil compaction. You install a rain garden but don’t extend your downspouts. You add mulch but pile it against your siding. It’s like building a dam with one section missing—the water just goes around it.
Bottom line: Landscaping only works when all components work together as a system, not isolated fixes.
The Soil Compaction Problem Nobody Talks About
Here’s something most landscaping guides skip: soil compaction is killing your drainage plan.
Over time, soil around your foundation gets packed down. Foot traffic, lawn equipment, settling—it all adds up. Compacted soil won’t absorb water, won’t drain properly, and won’t let your carefully planned grading do its job.
You can have perfect grading and the water still pools because the soil underneath is concrete-hard.
A homeowner in Rochester had this exact problem. Mark’s team came out after a heavy rain and found water sitting six inches from the foundation. The grading looked fine. But when they dug down, the soil was packed so tight you could barely push a shovel through it. A day of aeration fixed what regrading couldn’t.
The fix is simple but often skipped: aerate your yard every 2-3 years, especially in the zone closest to your house. This breaks up compacted soil, lets water drain, and helps your grass (and other plants) establish better root systems.
If you’re dealing with severe compaction near your foundation, you might need to excavate the top 6-12 inches of soil and replace it with fresh, well-draining material. It sounds extreme, but it’s cheaper than water damage.
Bottom line: Compacted soil defeats grading—aerate every few years to keep drainage working.
The Tree Root Trap: When Your Solution Becomes Your Problem
Trees pull water out of soil. That’s good, right? Trees near your foundation should keep water away.
Except it doesn’t work that way. Not really.
Trees with aggressive root systems—willows, poplars, silver maples—do pull moisture from soil. But they don’t pull it evenly. They create root zones that are drier in some spots and wetter in others. More importantly, their roots crack foundations, damage underground pipes, and leave voids in soil that collapse over time.
A homeowner in Rochester planted three silver maples thinking they’d help with moisture. Ten years later, his foundation had a crack running 15 feet across the basement wall. The trees had grown so large their roots were literally pushing against the concrete.
If you’ve already got aggressive trees close to your house, don’t panic. You’ve got options.
First, stop watering near the foundation. This keeps the soil drier and makes trees seek water elsewhere. Second, consider professional root barriers—physical installations that redirect roots away from your house. Third, if a tree is truly dangerous, removal might be the only answer. It’s not fun, but it beats a cracked foundation.
For new landscaping, stick with shallow-rooted plants near your foundation. Ornamental grasses, dwarf conifers, and flowering shrubs with fibrous root systems won’t threaten your structure. Save the big water-loving trees for the far side of your property.
Bottom line: Large trees near foundations cause cracks—keep aggressive root systems 20+ feet away.
Soil Type Matters Way More Than Most People Realize
Not all dirt is created equal. Your soil type determines how water moves—or doesn’t move.
Clay soil holds water. Sand drains too fast. Loam (the sweet spot) does both reasonably well. Most properties around Rochester have a mix, but the balance matters.
If your yard has heavy clay, water sits. It doesn’t drain away—it pools. You can grade perfectly, but if the underlying soil won’t absorb water, it’ll just flow sideways until it hits your foundation.
Sandy soil has the opposite problem. Water drains so fast it doesn’t have time to filter. It shoots straight down and can undermine your foundation or create erosion around your perimeter.
The solution is soil amendment. For clay-heavy areas, mix in compost or sand to improve drainage. For sandy areas, add compost to increase water retention and stability. You’re not replacing the entire yard—just improving the top 6-12 inches in critical zones around your foundation.
One Rochester homeowner had their soil tested and found it was 60% clay. No wonder water was pooling. They amended the top foot of soil around the foundation with compost and sand mix. Total cost: $800. Water drainage improved dramatically within one season.
If you’re not sure what you’re dealing with, grab a handful of wet soil. Clay sticks together like putty. Sand feels gritty and won’t hold shape. Loam crumbles but holds together slightly. That tells you what you’re working with.
Bottom line: Amend clay-heavy soil with compost to improve drainage around your foundation.
The Erosion Problem That Gets Worse Every Year
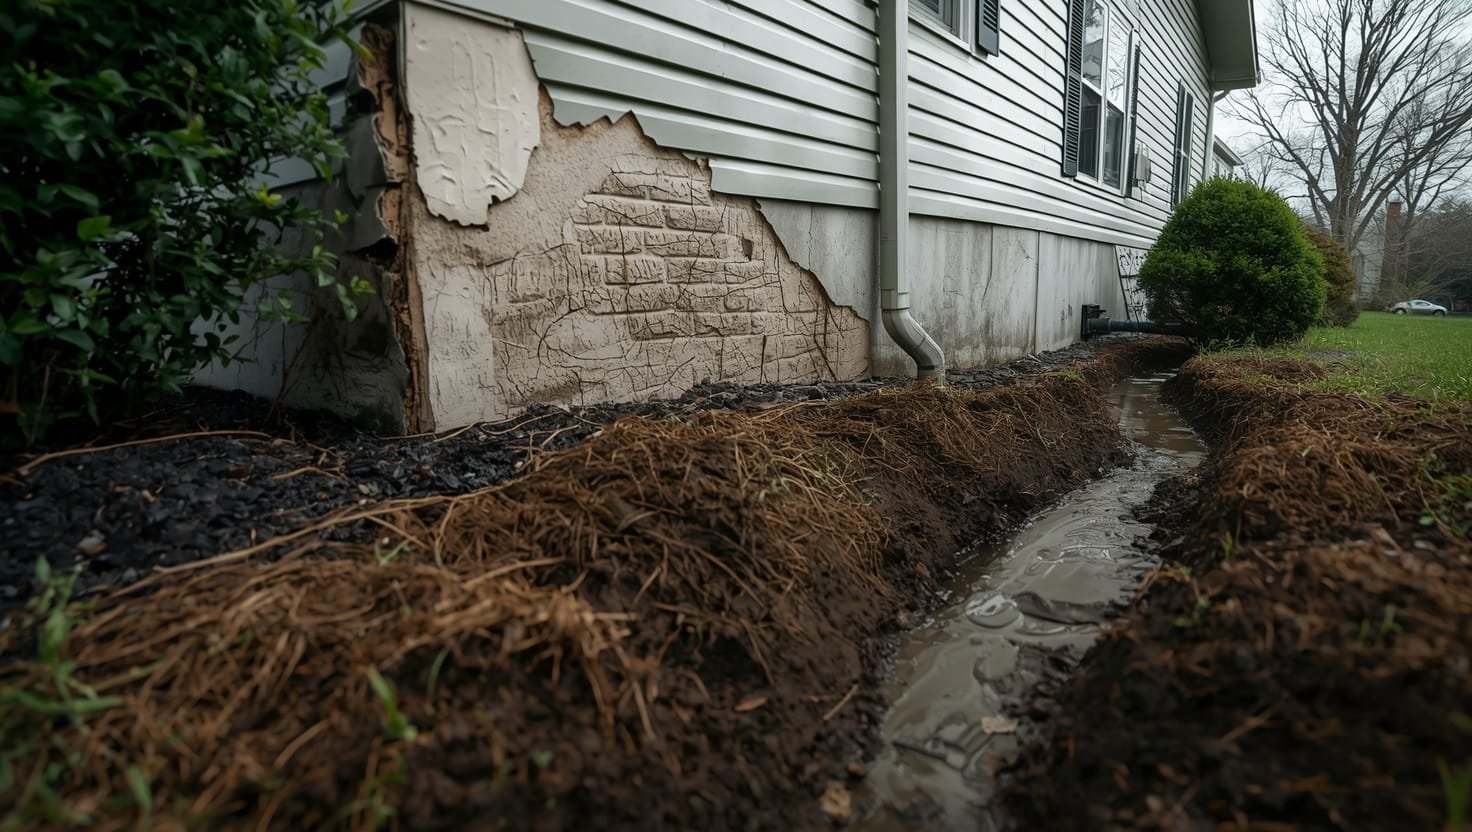
Water flowing downhill doesn’t just sit around—it erodes soil. Over time, this creates channels and low spots that funnel water straight at your foundation.
You’ll notice it as ruts or gullies in your yard. They start small, but each heavy rain makes them deeper. That’s water finding the easiest path, and if it’s pointing at your house, you’ve got a problem.
This is where swales really shine. They intercept water before it carves those destructive channels. A properly placed swale catches runoff and directs it away—solving two problems at once.
But here’s the catch: swales need maintenance. Sediment builds up. Plants die or get overgrown. If you ignore a swale for a few years, it stops working and starts looking like a ditch in your yard.
The fix is straightforward. Clear out sediment annually (usually in fall). Make sure water actually flows through the swale during heavy rain. Replant any vegetation that dies. It’s minimal work, but skipping it kills the system.
Native plants are your friend here. Sedges, switchgrass, and joe-pye weed thrive in wet conditions and don’t need much maintenance. They’ll stabilize the swale and prevent erosion while looking natural.
Bottom line: Swales prevent erosion but need annual maintenance to stay effective.
The Gutter-to-Ground Connection Most People Miss
You extended your downspouts to 6 feet away from your foundation. Good. But what happens to the water when it hits the ground?
If the ground slopes back toward your house, you’ve just moved the problem 6 feet. The water pools, soaks in, and travels sideways underground until it hits your foundation.
Your downspout extension needs to land on sloped ground that continues moving water away. Or better—direct it into a swale, rain garden, or proper drainage system that handles it.
Some homeowners use splash blocks under downspouts, thinking that’s enough. It’s not. The water spreads out, sits, and seeps down right there. You’ve just created a saturated zone 6 feet from your house instead of right next to it.
The best setup is underground downspout drainage. Bury PVC pipe under your yard that carries water 15-20 feet away, or connects to a storm drain system. It costs more upfront ($500-$1,500 per downspout depending on distance), but it’s the most reliable solution.
If buried drainage isn’t in your budget, at minimum ensure the ground slopes away from where your downspout water lands. And check it after heavy rain. If water’s pooling there, you’ve got a problem to fix.
Bottom line: Downspout water must flow away on sloped ground, not pool and seep toward your house.
Seasonal Changes That Kill Your Drainage System
Winter and spring are brutal on landscaping-based drainage. Snow melts, frost heaves shift soil, ice dams create pressure against your foundation.
In Rochester, freeze-thaw cycles are relentless. Soil expands when it freezes, contracts when it thaws. This movement can crack grading, shift mulch away from where you need it, and create new low spots where water pools.
Spring is when most homeowners discover their landscaping failed. The ground thaws, heavy rains hit, and suddenly water’s in the basement. By then it’s too late to fix grading or drainage—you’re dealing with water damage.
The solution is preventive winter maintenance. Before the first freeze, clear gutters completely. Check that downspout extensions are clear. Make sure mulch is still in place and hasn’t settled. If you see any new low spots or erosion from fall rain, address them before winter hits.
After thaw, do a full inspection. Walk your property after a light rain and see where water goes. If the pattern changed from last year, something shifted. You might need minor grading adjustments or mulch replacement.
This seasonal check—takes an hour, prevents thousands in damage.
Bottom line: Check grading after winter thaw; frost heave and settling shift your drainage system.
When Landscaping Alone Isn’t Cutting It
Sometimes you’ve done everything right and water still wins.
You’ve got perfect grading, healthy plants, extended downspouts, and a swale system. Then a 100-year storm hits and water breaches your foundation anyway. Or you discover you’ve got a chronic water problem that landscaping can’t solve alone.
This is when you need professional help. A proper drainage system installed around your foundation works with landscaping, not against it. It catches water at the foundation level before it can penetrate, then directs it away or to a sump pump.
Mark’s seen plenty of properties with perfect landscaping that still needed interior or exterior waterproofing because the water table was too high or the soil conditions made surface drainage impossible.
The good news? When you combine proper landscaping with professional waterproofing, you’ve got a complete system. The landscaping prevents water from reaching your foundation. The waterproofing catches anything that does. That’s redundancy—and it works.
Bottom line: Professional waterproofing + proper landscaping = complete water protection.
The Real Cost of Getting Landscaping Wrong
Let’s talk numbers. A homeowner ignores grading for five years. Heavy rain hits. Water seeps into the basement and sits there for two days before they notice.
Now they’re looking at water removal, structural drying, potential mold growth, and foundation repairs. We’re talking $15,000-$25,000 easy. Sometimes more if mold takes hold.
Compare that to the cost of fixing landscaping: $3,000-$5,000 for regrading, $1,000-$2,000 for a swale system, $500-$1,500 for downspout extensions. Total: maybe $5,000-$8,000 to do it right.
You’re preventing $20,000 in damage for $6,000 in prevention. That’s not an expense—that’s an investment that pays for itself the first time it rains hard.
And that’s assuming you catch it before water damage happens. If you wait until there’s active flooding, you’re adding professional basement waterproofing and mold remediation to the bill.
Bottom line: Prevent water damage for $6K; fix it after the fact for $20K+.
Your Action Plan: What to Do This Week
Don’t wait for the next heavy rain to see if your landscaping is working.
This week, do three things:
First: Walk your property after the next rain (even a light one). Stand near your foundation and watch where water goes. Does it pool? Does it flow away? Does it disappear into certain spots?
Second: Check your gutters and downspouts. Are they clean? Do they extend at least 4-6 feet away? Is water pooling where it lands?
Third: Look at your grading. Stand back and look at the slope. Does the ground obviously tilt away from your house? Or is it flat? Or (worst case) does it slope toward your house?
If you see problems—and most people do—write them down. Prioritize by urgency. Grading issues come first. Then downspout extensions. Then swales or rain gardens if needed.
You don’t have to fix everything at once. Start with the biggest problem and work through the list. Each fix makes your system more effective.
Frequently Asked Questions
How often should I check my yard’s grading for water pooling?
Check after every heavy rain, especially in spring and fall. If you’re seeing consistent pooling in the same spots, your grading needs adjustment. A yearly inspection (ideally spring) is standard maintenance.
Can I fix grading myself or do I need a professional?
Small adjustments (adding fill dirt, raking to improve slope) you can handle. Major regrading—especially if it involves excavation or significant soil movement—needs professionals with proper equipment. Get a quote; it’s usually $2,000-$5,000 depending on scope.
What’s the difference between a swale and a French drain?
A swale is above-ground—a shallow ditch with plants that directs water visibly. A French drain is underground—perforated pipe surrounded by gravel that filters and moves water. Both work; swales are cheaper and visible, French drains are hidden but more permanent.
Do I really need to extend downspouts 4-6 feet away?
Yes. Downspouts dumping water right next to your foundation is a leading cause of basement water problems. 4-6 feet is minimum; 10+ feet is better. Underground extensions are best if budget allows.
What plants are safest to plant near my foundation?
Shallow-rooted species: ornamental grasses, dwarf evergreens, small flowering shrubs with fibrous roots. Avoid willows, poplars, silver maples, and any large trees. Keep all plants 3-5 feet away from your foundation.
How much does a rain garden cost?
DIY rain garden: $200-$500 (digging, soil, plants). Professional installation: $1,000-$2,500. Some municipalities offer rebates for rain gardens because they reduce stormwater runoff—check with your local government.
What should I do if water is already leaking into my basement?
Stop the leak first. Landscaping fixes won’t help if water’s actively entering. You need professional waterproofing or drainage system installation. Once that’s handled, fix your landscaping to prevent it from happening again.
Is aeration really necessary if my yard drains okay now?
Preventive aeration keeps soil from compacting. If you wait until drainage fails, you’re playing catch-up. Aerate every 2-3 years as maintenance—it’s cheap insurance against water problems.
The Bottom Line: Your Landscaping Is a System, Not a Band-Aid
Landscaping around your house to prevent water works when all the pieces connect.
Grading gets water moving away. Plants and mulch stabilize soil and prevent erosion. Swales and rain gardens intercept runoff. Downspouts carry water safely away. Soil amendments improve drainage. Seasonal maintenance keeps everything working.
One weak link—ignored grading, compacted soil, a downspout dumping water in the wrong spot—and the whole system fails.
Mark Frillici and his team at Healthy Spaces have spent nearly 20 years helping Rochester homeowners get this right. They’ve seen what works and what doesn’t. They’ve watched people do one or two fixes and think they’re covered, only to discover water in their basement the next spring.
If you’re serious about preventing water damage, get a professional assessment. Mark’s team can evaluate your grading, drainage, and landscaping setup—and tell you exactly what needs fixing and in what order.
The cost of an assessment is nothing compared to water damage. And if you need help implementing fixes—whether that’s regrading, swale installation, or connecting landscaping to professional waterproofing—that’s what Healthy Spaces does.
Contact Healthy Spaces now for a free evaluation. Don’t guess about your foundation. Get answers fast, and protect your property before the next heavy rain.
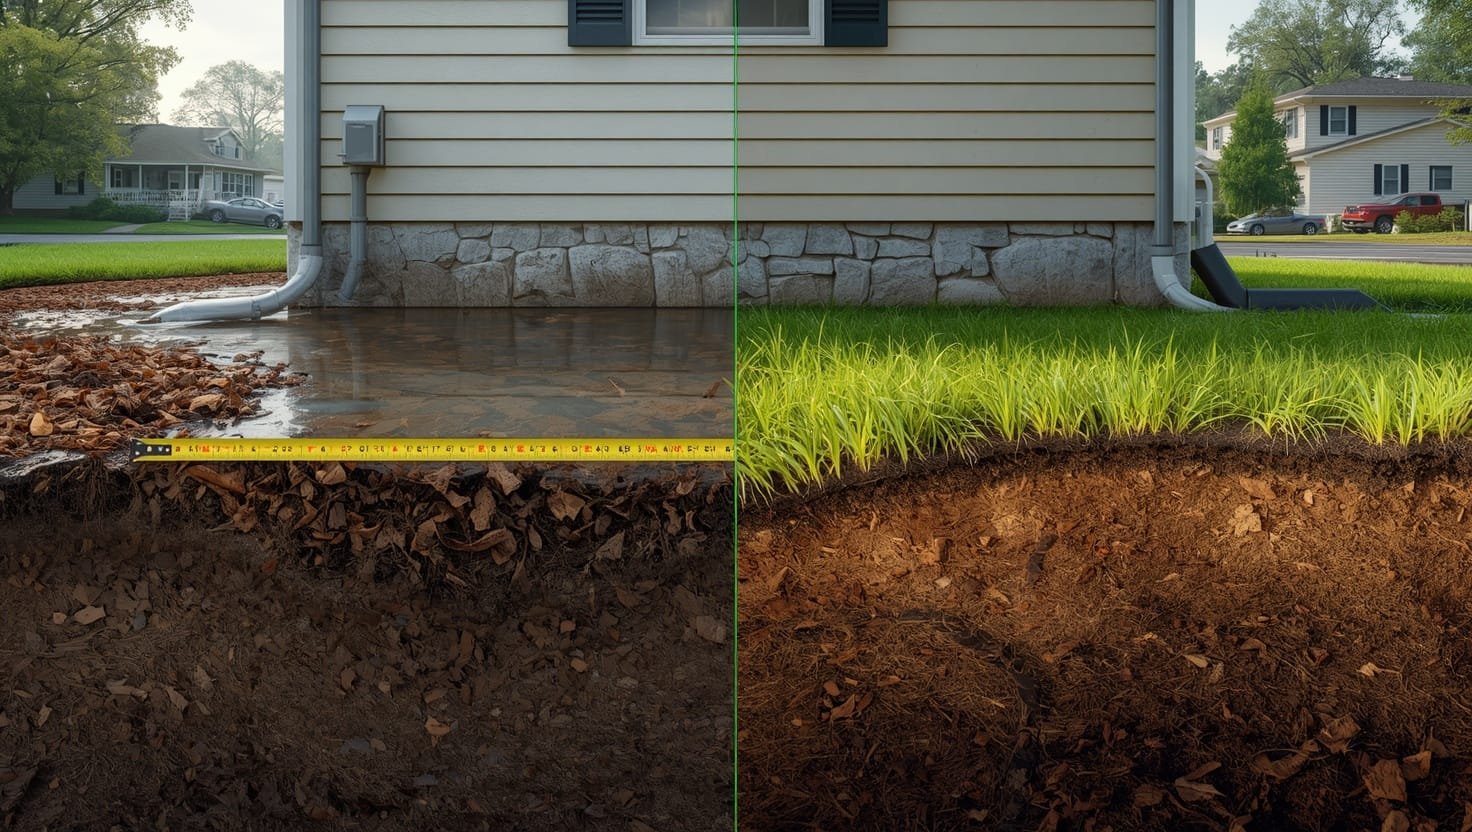
Your Neighbor’s Yard Looks Perfect—And It’s Costing Them Thousands. Here’s Why Landscaping Around Your House to Prevent Water Isn’t What You Think It Is
Most homeowners believe landscaping around your house to prevent water is about making things look good while keeping moisture away.
They’re half right.
The truth? Aesthetic landscaping and functional water prevention are two completely different games. You can have a stunning yard with perfect plants, manicured beds, and professional grading—and still wake up to a flooded basement. Why? Because beautiful landscaping and effective water management require opposite design principles.
This section breaks down what actually works versus what just looks nice, and why most homeowners get fooled by one but not the other.
The Curb Appeal Trap: When Your Landscape Designer Doesn’t Know Water
You hired a landscaper.
They came out, looked at your yard, and created a design that would make your neighbors jealous. Layered plantings. Color throughout the seasons. Mulch beds that frame your foundation like a picture.
Six months later, water’s pooling against your basement wall.
Here’s what happened: your landscaper optimized for beauty, not drainage. They planted ornamental grasses that look gorgeous but create dense root zones that trap moisture. They added mulch beds right up to your foundation (visually perfect, functionally terrible). They installed a patio with zero slope because level looks cleaner than sloped.
A homeowner in Rochester spent $8,000 on a complete landscape redesign. The yard was stunning. Within two seasons, water started showing up in the basement after heavy rain. The problem? The designer had routed all the grading toward a low spot directly adjacent to the foundation—perfect for water pooling, terrible for your basement.
The fix required ripping out half the new plants and re-grading the entire yard. Total cost: another $6,000. Plus the original $8,000 investment was partially wasted.
Bottom line: Beautiful landscaping without drainage strategy creates water problems, not prevents them.
The Plant Selection Mistake That Looks Good for Two Years
You know those ornamental plants that look incredible when you first plant them?
Hydrangeas. Hostas. Shade-loving shrubs with dense foliage. They establish quickly. They fill in spaces. They photograph well.
They also create humidity traps against your foundation.
Dense foliage blocks air circulation. It keeps soil wet longer. It creates an environment where moisture accumulates rather than evaporates. After a few years, you’ve got mold growing on your foundation wall, moisture creeping into your basement, and structural problems that started with a pretty plant choice.
The landscaping around your house to prevent water should include plants that actually allow air to move. That means choosing species with open branching structures, avoiding dense evergreen screens near your foundation, and—this is critical—spacing plants far enough apart that air can flow between them.
Native grasses are your friend here. Sedges, panic grass, switchgrass. They look natural. They establish well. Most importantly, they’re spaced with gaps that let moisture evaporate instead of accumulate.
One property in Rochester had three mature hydrangeas planted about 18 inches from the foundation. The homeowner loved how they looked. But the constant shade and moisture retention created the perfect environment for mold growth on the foundation wall. Removing the plants and applying a mold remediation treatment fixed the problem—but it should have been prevented with better plant selection from the start.
Bottom line: Open-spaced plants beat dense foliage near foundations every time.
The Hardscape Disaster: Patios and Walkways That Channel Water Into Your Basement
You’ve got a beautiful patio off the back of your house.
It’s level, which looks clean and professional. Water drains off it toward the yard. Everything seems fine until a heavy rain comes and water pools against your foundation faster than you’ve ever seen.
What happened? That level patio is now a water-catching surface. Rain hits it, spreads out, and runs toward the lowest point—which is your house.
Hardscaping (patios, walkways, driveways) needs to slope away from your foundation at the same rate as your yard grading: 1 inch of drop per foot of distance. Most contractors don’t do this because it’s less visually satisfying. A sloped patio looks tilted. A level patio looks professional.
The visual difference is maybe a quarter-inch of slope over 12 feet. You barely notice it. But that quarter-inch is the difference between water flowing toward your house and water flowing away from it.
If you’re planning hardscaping, insist on slope. If you already have a level patio or walkway, you’ve got options. Install a drainage channel (called a French drain) along the edge closest to your house to intercept water before it pools. Or use permeable pavers when you eventually replace the hardscape. Both solutions cost less than basement waterproofing and foundation repair later.
One homeowner’s contractor installed a beautiful patio without any slope. The homeowner didn’t notice the problem until the first heavy rain—water was visibly flowing toward the foundation. A $2,500 French drain installation solved it, but the patio should have been sloped in the first place.
Bottom line: Hardscaping must slope away from your house—level looks better but floods basements.
The Mulch Placement Error That Takes Three Years to Show Up
Mulch against your foundation looks finished.
It frames the base of your house. It looks intentional and well-maintained. It’s also slowly destroying your foundation.
Mulch piled against your house does three things, none of them good. It traps moisture against your siding and foundation. It creates a bridge for insects (termites love this). It accelerates wood rot if you’ve got wood siding or trim. On masonry or concrete, it holds moisture that causes efflorescence (those white, chalky stains) and accelerates deterioration.
The correct distance is 6 inches minimum between mulch and your foundation. That gap looks a little bare at first, but it serves a purpose—it lets air circulate and keeps moisture from accumulating.
You’ll also want to use the right mulch. Colored mulches treated with dyes break down faster and don’t drain as well. Hardwood mulch or cedar chips are superior for water management and last longer. Avoid rubber mulch near your foundation—it doesn’t break down, traps heat, and doesn’t help with drainage.
A property owner in Rochester had mulch piled right against the foundation. After three years, the concrete showed visible moisture damage and the wood trim had started to rot. Pulling the mulch back 6 inches and letting the foundation dry out prevented further damage, but the initial deterioration could have been avoided.
Bottom line: Mulch 6 inches away from foundation prevents moisture traps and rot.
The Downspout Extension Myth: Why 4 Feet Away Isn’t Actually Safe
You extended your downspouts 4 feet away from your foundation.
You feel good about it. You’ve done what the articles said to do. Then water shows up in your basement anyway.
Here’s the issue: 4 feet away is the minimum to keep water from pooling directly against your house. But it’s not far enough to prevent water from soaking into the ground and traveling sideways underground toward your foundation.
Water doesn’t just sit where it lands. It percolates down into the soil. If that soil is sloped or compacted, water migrates laterally toward lower points—which is often your foundation.
The real solution is either 10+ feet away (if you’re extending the downspout above ground) or underground drainage that carries water 15-20 feet away from your house. Yes, it costs more. Buried downspout extensions run $500-$1,500 per downspout depending on distance and soil conditions. But that’s nothing compared to water damage.
One homeowner extended their downspouts exactly 4 feet and thought they were protected. After a heavy spring rain, water pooled at the end of the extension and soaked into the ground. Within weeks, moisture was showing up in the basement. A proper underground drainage system fixed it, but it should have been installed right from the start.
Bottom line: Downspout extensions need 10+ feet or underground drainage to actually work.
The Seasonal Shift Nobody Expects: Why Your Landscaping Changes Every Year
You fixed your landscaping last spring.
Grading looked perfect. Drainage worked. Water flowed away from your house beautifully.
Then winter hit. Snow piled up. Frost heaved the soil. Spring came and suddenly your grading is different. Low spots appeared. The slope you carefully created is now flatter in some areas.
This is freeze-thaw damage. It’s relentless in Rochester and other cold climates. Soil expands when it freezes, contracts when it thaws. Over multiple cycles, this movement shifts grading, settles mulch, and creates new low spots where water pools.
One homeowner spent $4,000 regrading their yard in early spring. By the following winter—after multiple freeze-thaw cycles—the grading had shifted noticeably. Not enough to cause immediate problems, but enough that water wasn’t flowing away as effectively.
The solution is annual inspection and minor maintenance. After winter thaw, walk your property after a light rain. Watch where water goes. If the pattern changed from last year, you need adjustments. Usually it’s minor—raking to restore slope, adding mulch where it settled, fixing erosion from winter runoff.
Budget for this. Landscaping isn’t a one-time fix. It’s a system that needs seasonal attention to stay effective.
Bottom line: Freeze-thaw cycles shift grading annually—inspect and adjust every spring.
When Your Landscaping Is Perfect But Water Still Wins
You’ve done everything right.
Grading slopes perfectly. Plants are properly spaced. Mulch is 6 inches away. Downspouts extend 15 feet. Swales intercept runoff. Hardscaping is sloped.
Then a 100-year storm hits and water breaches your basement anyway.
Or you discover that your water table is naturally high, or your soil is so clay-heavy that nothing infiltrates, or your foundation has pre-existing cracks that no amount of landscaping will seal.
This is when you need to accept that landscaping has limits. It prevents most water problems. It doesn’t prevent all of them.
That’s where professional wet basement drainage systems and foundation repair come in. These systems work at the foundation level, catching water before it can penetrate and directing it away or to a sump pump.
The best approach is layered defense. Landscaping prevents water from reaching your foundation. Professional waterproofing catches anything that does. Together, they’re nearly bulletproof.
Mark Frillici has seen properties with flawless landscaping that still needed waterproofing because of site-specific water issues. He’s also seen properties with terrible landscaping that stayed dry because they had proper basement waterproofing installed. The best scenario? Both working together.
Bottom line: Perfect landscaping plus professional waterproofing beats either one alone.
The Cost Reality: Invest Now or Pay Later
Let’s talk money.
Proper landscaping around your house to prevent water costs $5,000-$10,000 for a comprehensive approach. Regrading, drainage systems, plant selection, hardscape fixes, downspout extensions—the whole package.
Water damage costs $11,000 on average per incident. Basement flooding? $15,000-$25,000 easily. Mold remediation? Another $5,000-$10,000. Foundation repair? That’s $10,000-$30,000 depending on severity.
The math is simple. You’re spending $7,000 to prevent $20,000+ in damage.
That’s not an expense. That’s the cheapest insurance you’ll ever buy.
Bottom line: Prevention costs $7K; water damage costs $20K+. Do the math.
Your Next Move: The Landscaping Audit You Need to Do This Week
Don’t wait for the next heavy rain.
This week, do a 30-minute audit of your current landscaping setup. Walk around your house and check these specific things:
Stand near your foundation after any rain and watch where water goes. Does it flow away or pool? Does it disappear into certain spots? Write down what you see.
Look at your mulch placement. Is it 6 inches away from your foundation? Or piled right against it? Measure if you’re not sure.
Check your hardscaping. Does your patio or walkway slope away from your house? Or is it level? Stand on it after rain and watch water movement.
Trace your downspouts. Where does water land when it exits the extension? Is the ground sloped away or does water pool there?
Look at your plants. Are they dense and blocking air flow? Or are they spaced with gaps that let air circulate?
Write down everything that needs attention. Prioritize by urgency. Grading issues first (water pooling). Then downspout fixes. Then plant adjustments. Then mulch repositioning.
You don’t fix everything at once. Start with the biggest problem and work down the list. Each fix makes your system more effective.
Quick FAQ on Landscaping Around Your House to Prevent Water
Should I hire a landscaper or a drainage specialist?
If you need grading, plant selection, and general yard design, a landscaper works. If you need drainage systems, foundation-level solutions, or you’re dealing with existing water problems, get a drainage specialist or foundation repair company. For comprehensive prevention, you might need both.
How often should I check my yard’s grading?
After every heavy rain and at minimum once per spring after thaw. If you’re seeing consistent pooling in the same spots, your grading needs adjustment. Annual inspection is standard maintenance.
Can I fix grading myself?
Small fixes—adding fill dirt, raking to improve slope—you can handle. Major regrading needs professional equipment and expertise. Get a quote; it’s usually $2,000-$5,000.
What’s the best distance for plants from my foundation?
At least 3-5 feet for shrubs and smaller plants. 20+ feet for large trees with aggressive root systems. This prevents root damage and allows air circulation to reduce moisture.
Do I really need underground downspout drainage?
If you’re dealing with water problems or want maximum protection, yes. If your yard slopes well and water drains away naturally at the point where downspouts land, surface extensions to 10+ feet can work. But underground is more reliable.
What if I already have water in my basement?
Stop the active leak first with professional waterproofing. Then fix your landscaping to prevent it from happening again. They work together—waterproofing stops current problems, landscaping prevents future ones.
The Reality Check: Landscaping Alone Won’t Save a Wet Basement
If you’re already dealing with water intrusion, mold, or foundation damage, landscaping fixes won’t solve it.
You need immediate professional intervention. Mark and his team at Healthy Spaces have helped countless Rochester homeowners stop active water problems and then prevent them from recurring with proper mold inspection and remediation followed by landscaping improvements.
The combination works. One without the other doesn’t.
If your basement is dry and you’re doing prevention, landscaping is your first line of defense. If water’s already in, you need professional help first, then landscaping second.
Bottom line: Active water problems need professional fixes; prevention uses landscaping strategy.
Your Foundation Depends on What You Do Next
Landscaping around your house to prevent water works when you understand what actually prevents water versus what just looks nice.
Beautiful yards and dry basements don’t always go together. But functional yards and dry basements do.
Start with an honest assessment of what you have. Then fix the biggest problem first. Work through the system methodically. And if you’re dealing with existing water issues, don’t waste time guessing—get professional help.
Mark Frillici and Healthy Spaces have been protecting Rochester homes since 2006. They’ve seen what works, what doesn’t, and what kills homeowners financially. If you want a real assessment of your current landscaping and drainage setup—or if you’re already dealing with water damage—contact Healthy Spaces now.
Your foundation’s survival might depend on what you do this week. Don’t guess. Get answers.